![]()
(3/11/01): Time to work on the floorpans, and the
carpet!!! For the next few days, I will be ripping out the old carpet, and
tarboards in my car. I will then be restoring the floorpans with
"POR-15 trunk and floorboard resto kit" that I picked up at www.aircooled.net.
Then I will be installing new tarboards, and new padding, and new sewfine carpet
(also picked up from www.aircooled.net)
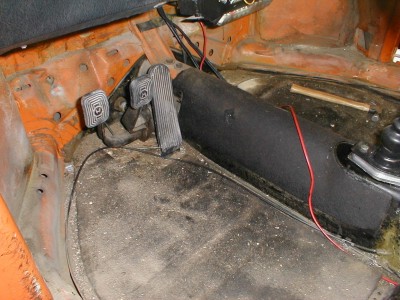
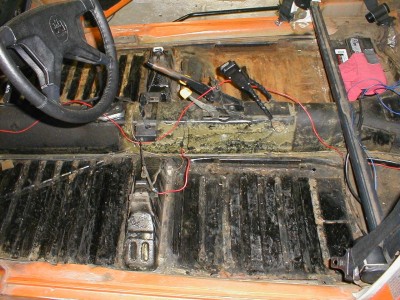
Here is what the front of the car looked like once I pulled out the old
carpeting (which looks original...) As you can see the dirt, and the
tarboards are concealing the pan.
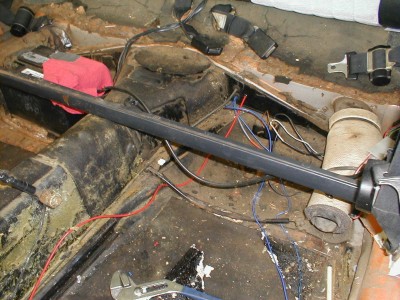
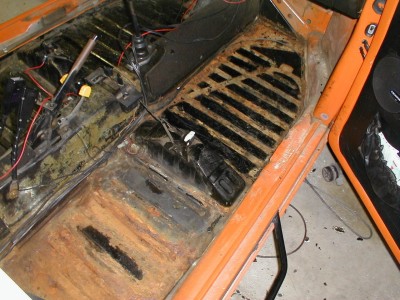
This
is what the rear area looked like. You will notice I temporarily duct
taped a rag over the + terminal on my battery - Just in case I drop a tool
across it or something...
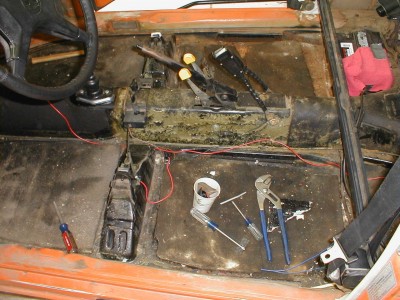
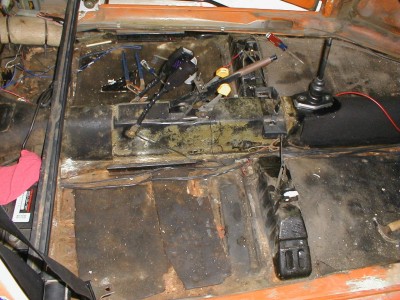
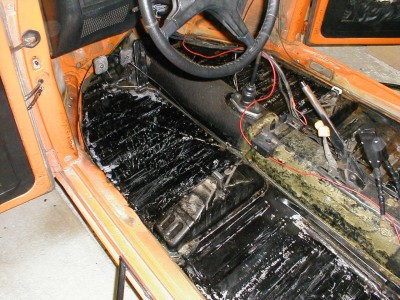
Here
is what both sides look like. The drivers side doesn't look too bad, but
the passenger side is another story. Oh, and all the 'green stuff' on the
tunnel is just ancient glue used to hold the old carpet in.
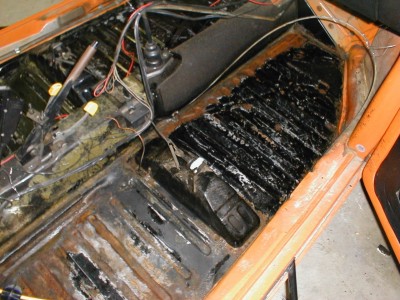
Here's
the passenger side... Notice the tarboard is in several pieces and its
loose (not a good sign). Lets see 'what lies beneath'
Ahh,
figures. After several hours of painstakingly scraping the old tarboards
off (well, the ones that were still 'bonded' anyway), This is what it looked
like. We are now down to the metal. Notice the drivers side looks
great, while the passenger side is pretty rusty (I think the battery has
something to do with it!).
This
is the front and rear section of the passenger side floorpan. The front
part looks 'o.k.' just some relatively mild rust, while the middle section is a
little heavier with rust.
The
next step, was to clean thoroughly with marine clean, and then keep the pans wet
with metal ready for 30 minutes or more (I did around 45). Notice now how
all the light rust areas are gone, leaving only the bare metal? This stuff
works great so far!
Here's
the passenger side. Notice the heavily rusted areas didn't change
much... This is O.K. though, because the por-15 silver is MEANT to be
painted right over rust!! BTW, the metal ready leaves a coating of Zinc
Phosphate (which helps any paint to bond better).
After
the pans were cleaned, and then sprayed with metal ready, I let them set
overnight just to make sure no water remained in the pores of the metal. Part
36 will entail the painting of the pan. Stay tuned!
![]()
![]()
![]()
![]()
![]()
![]()
![]()
![]()
![]()
![]()
