![]()
(9/16/00): Turns out, I got quite busy and was
unable to mount anything up to the engine... Looks like I will be doing
that tomorrow :-) So while I've had a few spare moments, I installed my
new 'foam' "tar"-board... Its just the 3 piece insulation stuff,
that goes in the engine compartment. I opted for the foam, instead of the
true tar-board, because its: cheaper, lighter, and is just as good. This
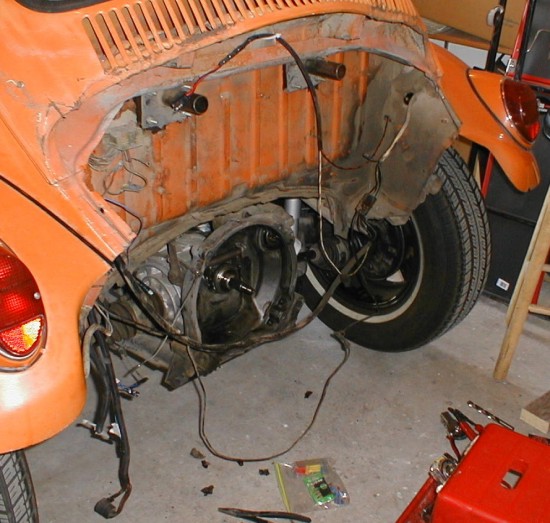
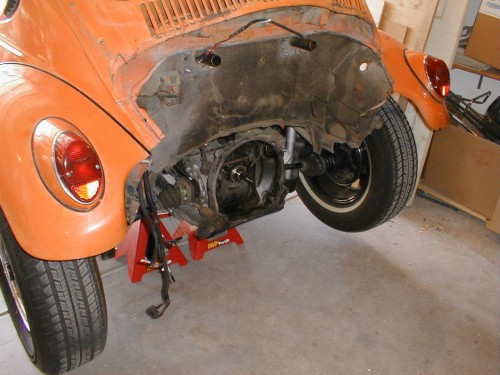
is what I started out with... Going from top to bottom, left to right: we
have the wires for the license plate light, just below that, the two mounts for
my old engine cage, to the left of that the UGLY VW diagnostic port, and behind
all that stuff the OLD tar-board (looks like a nasty layer of dirt in the
pic). And below that, the "engine wires" hanging down.
Also notice the wires for my taillights (the ones on the fenders) come around
the "rear-end" of the car (you can see the white wire on the right
side). These are all things that need attention.
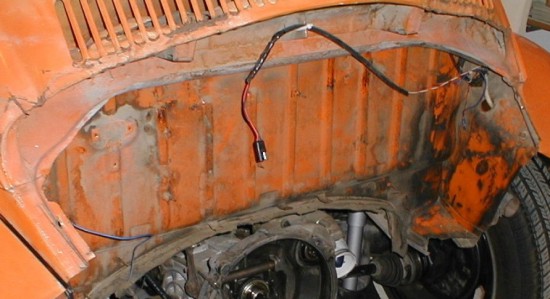
Here's what it looked like after I pulled most of the tarboard off...
Again you can see the mounting spots for my old baja bumper (which need to come
off, for the new one), the diagnostic port with 20 or so wires hanging out, and
my taillight wiring (which I was trying to figure out how I was going to
re-route it). I decided I needed to "clean-up" the wiring in the
rear, since they had been cut and spliced, and twisted, and whatnot... I
also noticed my right taillight didn't work so great (it was really slow and
dim); turned out to be that it wasn't grounded good enough. I decided to
go ahead and pull off the diagnostic port (which is useless to me), since it
took up room, and looked rather gross. I mostly just pulled the port itself
off; the wires are still there, they are just tucked up out of the way, and out
of sight; So if I ever need to put it back on again I can, but I don't see the
need to.
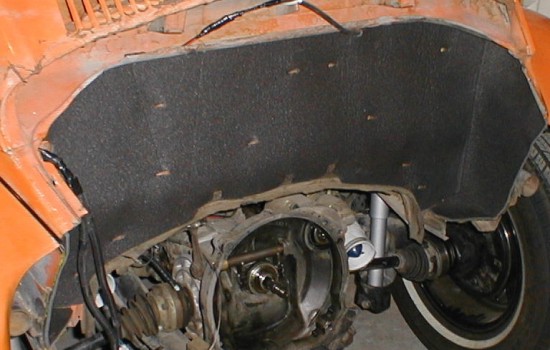
Here it is with no diagnostic port, and a whole lot less wire (its
hidden)... I decided to run the taillight wires through holes in the rear
fender-wells (the right-side hole was pre-existing), and used grommets made from
R/C Airplane fuel line, with a slit in them (they slip right over the
metal). And I tucked the rest of the wire was up out of the way. Now
I need to install the new foam (after I clean the area up a bit).
DONE!
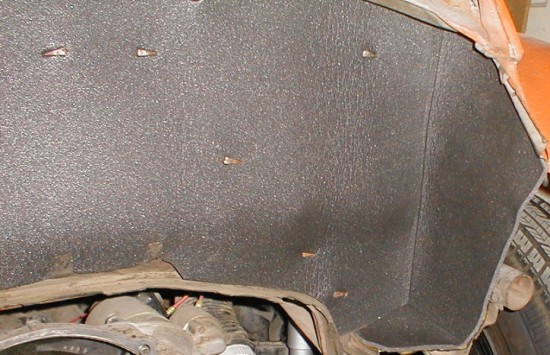
Here's what it looks like, in all its glory :-) I put on the side pieces
first, and trimmed them (since my VW is a baja), and used "3M Super
weatherstrip adhesive" to hold it in place (used a few clamps to make sure
it wouldn't go anywhere. Then I put in the large center piece. Only
used a little glue on the outside edges (to the left and right side) to keep
them from "flapping"; everything else is held in with the factory
"bendy-spikes" (those little pieces of metal you can see scattered
around). Here's
what the left side looks like (those wires hanging down go to the engine).
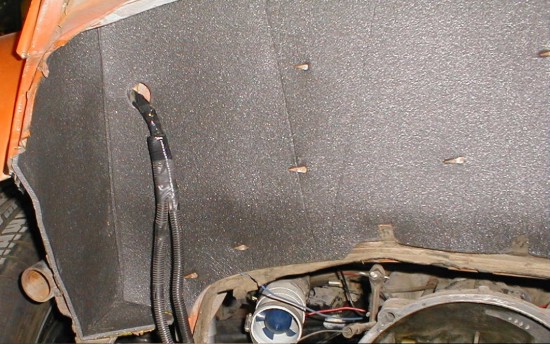
Oh, and that propeller looking thing you can see at the bottom middle, is a
"bilge blower" (for a boat), I use 2 in-line (1 on each side) after my
heat exchangers, for a tad more heat in the winter (nope, haven't melted 'em
yet).
Here's
what the right side looks like... MUCHO better than the old stuff!
That's
it for that little project, I hope to work more on the engine tomorrow...
Stay tuned for part 20!
![]()
![]()
![]()
![]()
![]()
![]()
![]()
