(7/24/2002) - Drilling & tapping ALL the oil galleries in the VW engine case is something that EVERYONE should do when putting together an engine! Its a relatively simple process: Just pull out the stock aluminum plugs, drill, run a tap into the hole, and plug! Pulling all the gallery plugs on a case enables you to THOROUGHLY clean every crevice. Soaking and blowing out with compressed air just DOESN'T CUT IT! Some of the galleries are over-drilled and have 'corners' - so even when you air them out, there is still a bunch of 'junk' in them. This 'junk' eventually makes it through the oiling system and contaminates bearings, etc. If you are going to the trouble of building (re-building) an engine, might as well spend a little extra time getting it perfect. And while you are drilling and tapping, it doesn't take much more to add a full flow oil filter to the system. The stock VW engine only has that mesh screen "filter" which only gets the large chunks (and by that time your engine is probably toast anyway). By removing the TINY particles from the oil, you can extend bearing & engine life by an incredible amount! By reading the rest of this article, you will acquire all the info you need to drill, tap, and install a full flow filter to your engine case.
![]()
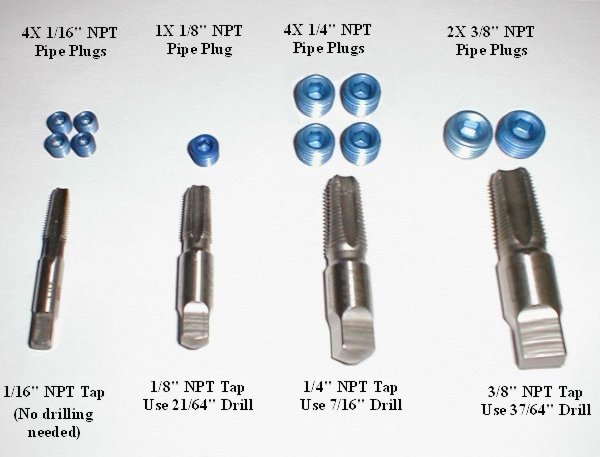
So what all do I need? You will need 4 sizes of NPT taps: 1/16"NPT, 1/8"NPT, 1/4"NPT, and 3/8"NPT. You will also need four 1/16" plugs, one 1/8" plug, four 1/4" plugs, and two 3/8" plugs. You will obviously need a drill, some handles for the taps (in a couple cases you will have to use a wrench), some loctite, a drift, & a slide hammer. The loctite you should be able to find at any "car" place (pep-boys, checker, etc). You can find the slide hammer and drift at most any hardware store in the tools section.
A note about NPT Taps: It has come to my attention that some of the smaller taps are hard to find for some people (especially the 1/16" NPT). I am able to get all my taps locally, but for those of you who cant, you should be able to find all the taps you need online at: McMaster-Carr and E-Taps (e-mail them if you cant find them listed!).
A note about NPT Pipe Plugs: They will come in two flavors - Aluminum and Steel. There are benefits and downsides to both. Aluminum plugs are harder to find, and cost more, but tend to leak less than steel (IF they leak) because the expansion rate between the Al plug and the case is very close. Steel has a much different expansion rate, therefore more of a tendency to leak. The downside to Al plugs comes when you need to remove them - With them in tight (and with loctite) I have heard the Allen head tends to strip! However, I think that if you are careful and use a little heat (torch) you should be able to get them out. I went with aluminum because I don't want ANY leaks! You should be able to find the pipe plugs at almost any high-performance engine shop, or online at Summit Racing.
![]()
What do I do first? First you will need to know WHICH plugs to pull!
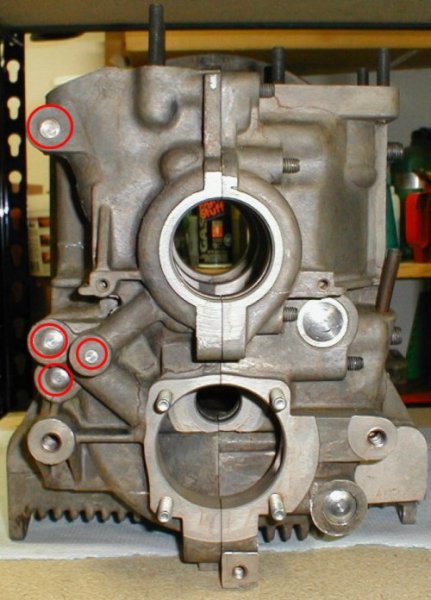
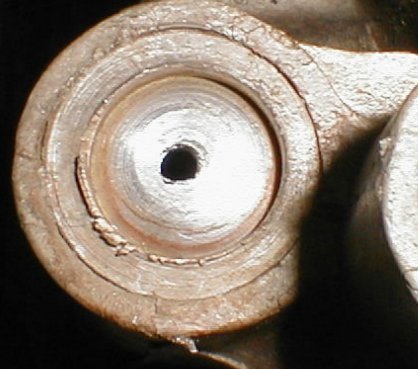
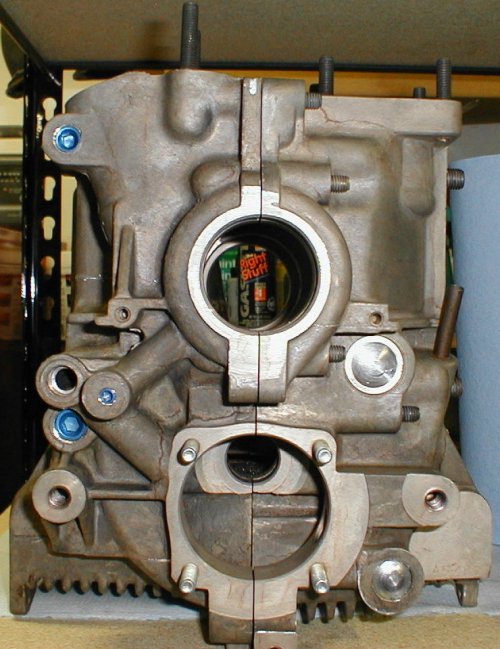
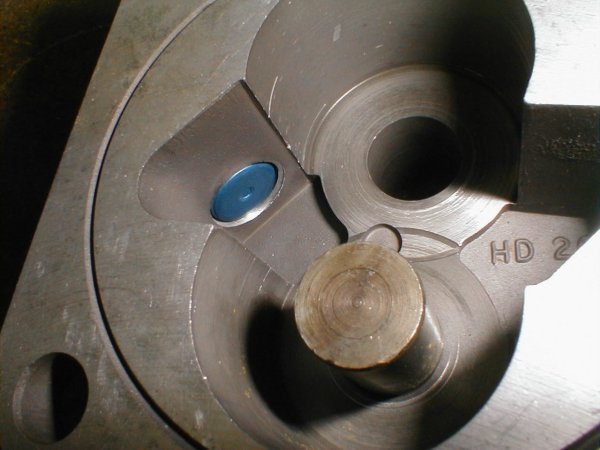
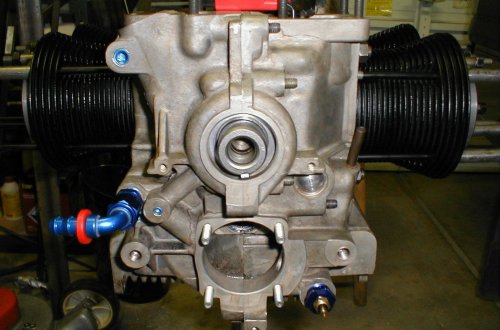
On the pulley end of the case, there are 4 plugs (circled in red below): The tiny 6.25mm plug, the pair of 14mm plugs, and the 12mm plug.
On the side of the case there is one 6.25mm plug (circled in red below):
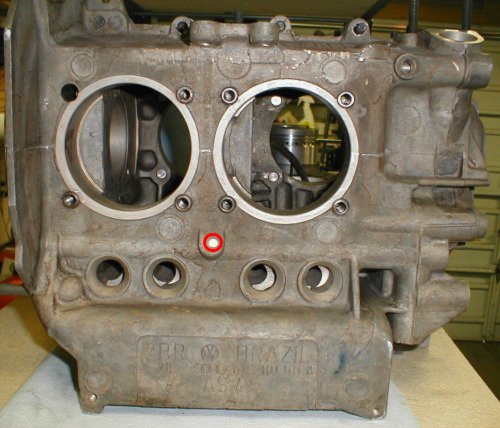
On the top of the case (near where the oil pressure sensor is) there is one 12mm plug (outlined in red below):

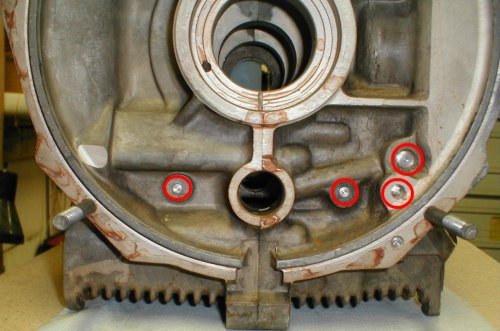
On the flywheel end of the case, there are 4 plugs to pull (outlined in red): two 6.25mm plugs, one 14mm plug, and one 9mm plug.
![]()
Now that you know which plugs to pull, you need to know HOW to pull them.
The first thing you need to do is centerpunch the hole:

Then you need to drill into the plug (1/8" bit should work)
Then you find the appropriate size sheet metal screw and thread it in. Then attach to your slide hammer and get the plug out!
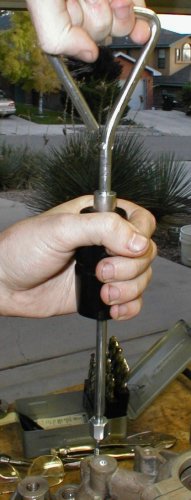
SUCCESS:
![]()
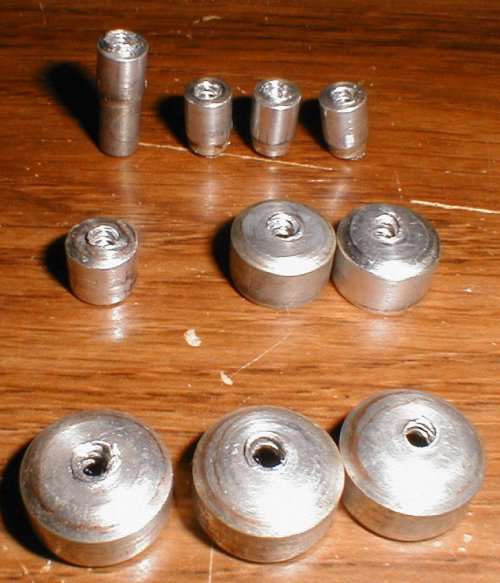
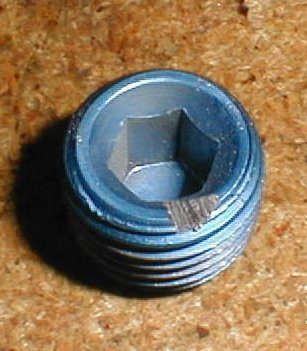
Here are what all the plugs look like:
![]()
Now you need to prepare for plugging the holes - in order to do that you need to drill and tap them. When plugging the SMALL holes (where the 6.25mm plug went) I found it is NOT necessary to drill first (at least on my NEW Brazilian case), just tap it! A few of the others may not need to be drilled also.
A note about tapered reamers: Technically to "correctly" tap a tapered hole, it needs to be reamed with a tapered reamer. A tapered reamer works similarly to a tap, but instead of cutting threads, it cuts material (like a drill-bit only at an angle) - they look kind of like long tapered spikes (I will upload a pic here soon hopefully). It basically turns a standard hole into a tapered hole. In some instances this is necessary in order to use a tapered tap (otherwise its VERY hard to tap the hole, and you can end up breaking off the tap, and/or cracking whatever you are tapping). I have found it to be quite a hassle to do on aircooled engine blocks, and I was successful WITHOUT using a tapered reamer. Its a nice thing to have, but not absolutely necessary in this situation IMO. Tapered reamers can also be fairly hard to find (try the sites listed above).
When drilling/tapping the case, you need to be careful NOT to damage anything - this means MAKE SURE the oil relief pistons are OUT, make sure the drillbit/tap is straight (or pretty close), and don't put a HUGE plug in a small hole. The 1/16" plugs go where the 6.25mm plugs were, the 1/8" plug goes where the 9mm plug was, the 1/4" plugs go where the 12mm plugs were, and the 3/8" plugs goes where the 14mm plugs were. NOTE: There will be one hole you WONT plug on the front of the case (See pic below to see exactly which one it is!) - this is where the fitting for the full flow filter return will go!!!!
And another thing: GO SLOW - cut a couple threads, then test fit the plug! You will want the plug to be flush with the case when its tight.
![]()
With the case drilled, and tapped it should look something like this (we are not done yet though!):

![]()
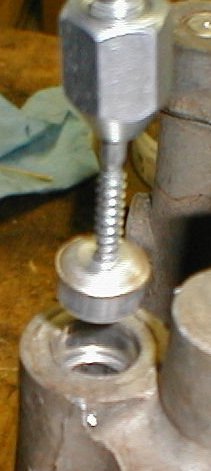
The next thing you will need to do is modify the case and pump for the full flow filter system. To do this you must block the outlet at the case AND pump (using 1/4" plugs).
On my schadek blueprinted pump, I found that the tap had to go as far as it could go before the plug would fit perfectly.
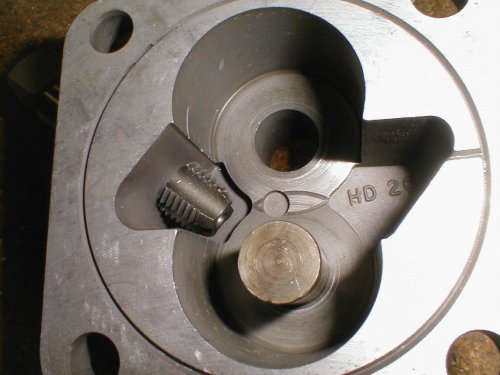
You want the plug to be just slightly recessed (since the pump is a machined fit in the case) - don't forget to debur the hole!
You also need to make sure the plug doesn't go too far into the pump.
![]()
When tapping the case, start it as straight as you can get it, because you will have to use a wrench to cut the threads (the handle for taps wont fit at this angle).
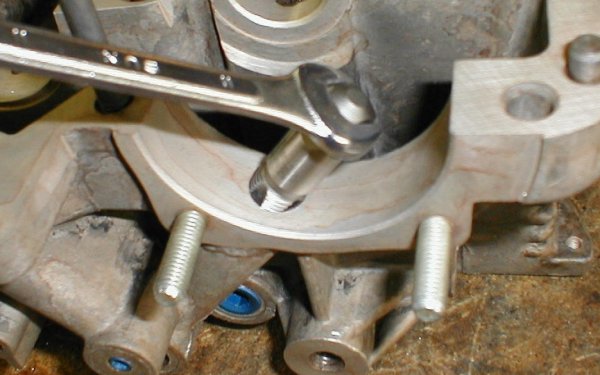
Then plug it keeping in mind that it needs to be just slightly recessed.
![]()
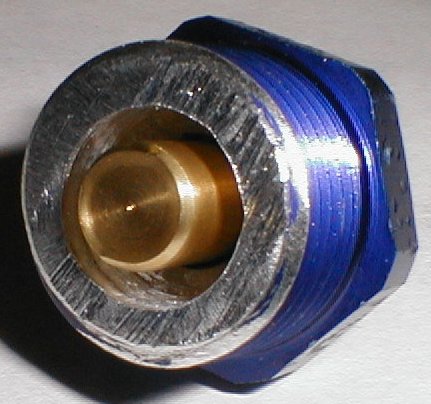
Although I did get fittings in the "filter kit", I decided that I wanted to put an aluminum fitting (to match the rest) in the case... For now I will just use the brass fittings for the bypass pump cover and filter adapter. (these aluminum ones look REALLY good! - but they are expensive...)
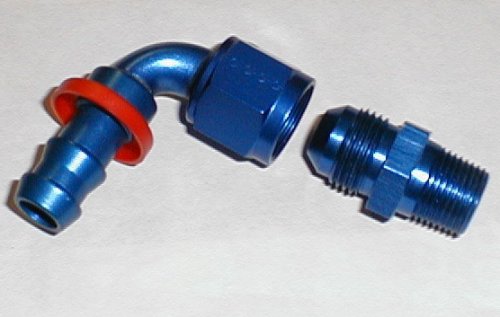
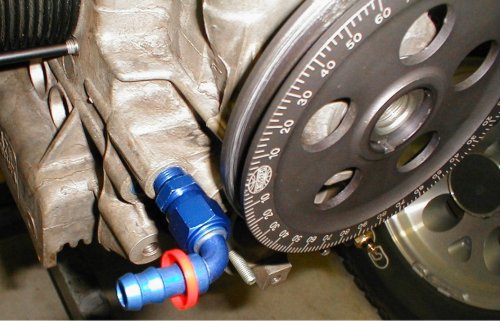
Here it is installed - looks & fits good (With this fitting, you don't have to machine out a 'notch' next to the small plug).
The fitting is close to the pulley, but not too close (it looks much closer in this pic for some reason...)
A note about hose ends and hose: After having the full flow setup on my car for a while, and pulling the engine a few times to fix miscellaneous stuff, I have found that while the brass fittings do work fine, the aluminum units might be a better choice if you intend to remove/install lines or remove the engine, etc. The hose that I used goes on so good that you CANNOT pull it off - the only way to remove it is to cut it. After cutting it a few times it becomes too short, and then you need more hose (which means you need to spend more $$). If you are like me and tend to pull the engine often, you might want to consider making all the lines that go to the engine easily removable. What you do is replace the one piece brass barbed fitting with NPT to AN adapter, and then an AN barbed hose end on the adapter. This way you can remove the hoses without cutting! (I'll try to upload pics of the new fittings sometime...).
![]()
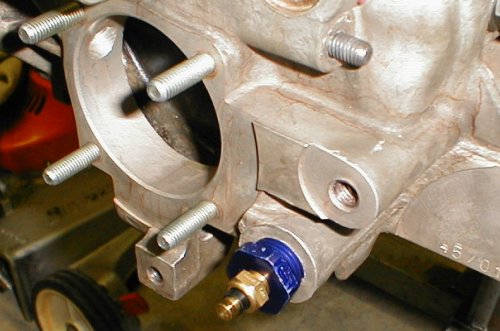
For a while I have been wanting to move my oil temp sender somewhere better (I had it in a 't' fitting in the oil pressure location). I thought that the BIG plug on the (by inlet side of the oil pump) would be a good place for it (since oil is constantly flowing past there). So I found an aluminum reducer that fit the case and the oil temp sender, and I pulled the plug, tapped it, and installed it!
I DID have to modify it a bit - it was too long (I cut about 4 threads off), then I tapped the hole deeper for the oil temp sender (so it would stick out), and then I drilled a larger hole up to the start of the threads so that the 'bulb' of the temp sender would be exposed. This ensures oil will pass by it.
Here it is installed:
![]()
Now that all your plugs and adapters and fittings fit correctly, its time to remove them all and CLEAN the case THOROUGHLY (this is assuming all your other machine-work is done on the case). Bore brushes work great for cleaning out the galleries in the case. Most galleries you will be able to look through to see that they are clean.
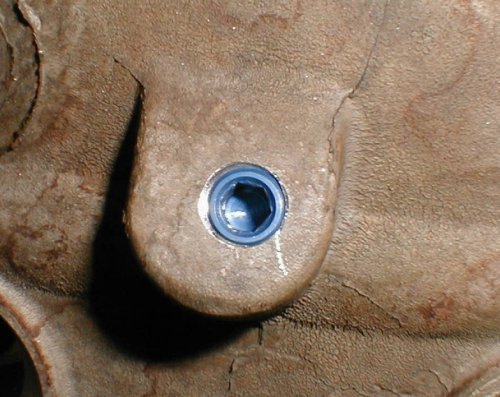
Once the case is clean and ready to go, its time to re-plug it - and this time you have to seal the plugs and 'lock' them in (you DON'T want these suckers to come out on accident!).
First thing to do is to figure out where you want to swedge the metal from the case into the plug from. I just tightened the plug and used a permanent ink marker to give me an idea where I wanted it.
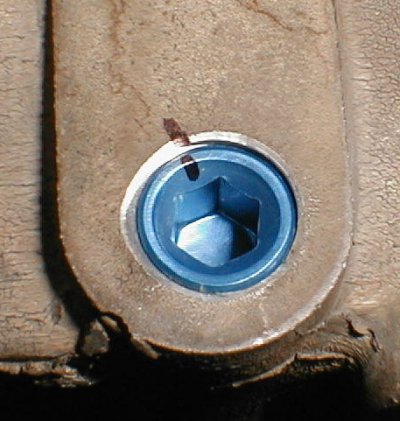
Then you take a file, or a dremel and cut/file a 'V' (or maybe more of an "L") shaped notch in the plug where your mark was.
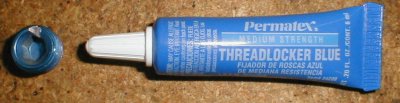
Now apply a little blue threadlocker (blue permatex/loctite/whatever).
Once the plug is in tight with threadlocker on it, you can swedge the material from the case into the plug to keep it from coming loose. Use a round nose drift (or just an old dull one) and LIGHTLY swedge it.
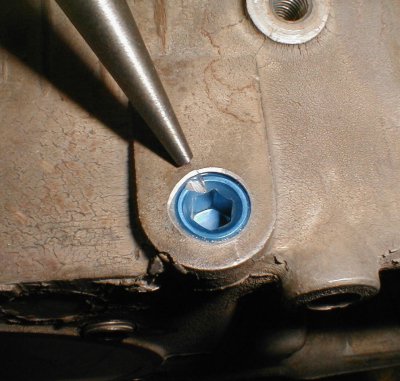
This one came out a little messy, but it's acceptable. You DON'T need a LOT of material in the plug - just a little will hold it PLENTY tight (try to remove it and you will see what I mean).
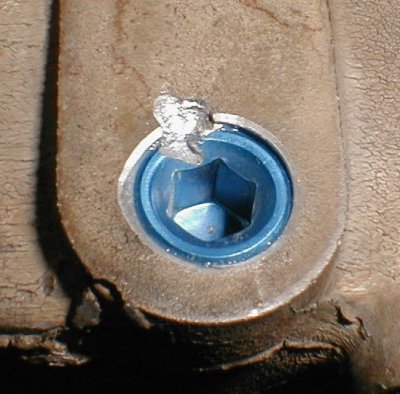
![]()
If you are extra worried that your other fittings might come loose, here's what I do:
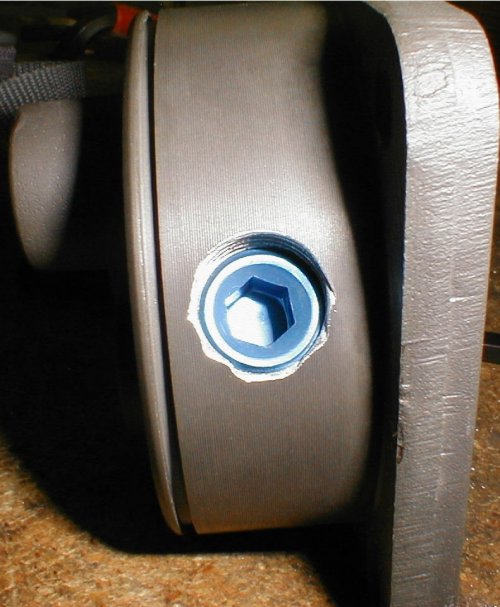
This is how airplane fittings are locked in - safetywire! Take a SMALL drill-bit (the size of the safetywire - you might need to buy some special size safety wire drill bits) and drill through at least 3 of the flats (preferably ALL of them) - BE CAREFUL that you don't drill crookedly and put a hole all the way to the inside (and ruin the fitting). Then find a suitable location for a hole in the case, and drill it also. Now you can twist the safety wire in such a way that the fitting WONT come out!
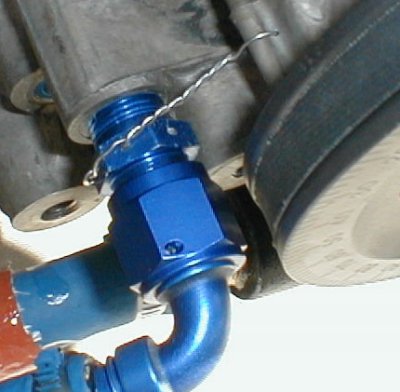
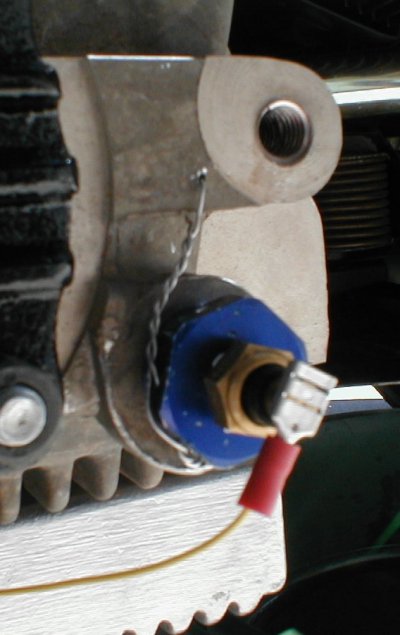
![]()
<<<<<<<<<<<<<<<Article NOT COMPLETE YET!>>>>>>>>>>>>>>>
Still to be covered: mounting the adapter/filter.
![]()
WARNING, use articles at own risk! Please, DO NOT blame me for anything wrong in the articles. I am not responsible for any damage to your vehicle, nor am I responsible for any bodily harm incurred as a result of using these articles. Use these articles as references only, ALWAYS try to be as safe as possible when working on your vehicle! Respect your car, and it will respect you!
![]()
![]()