![]()
I recently wrote a VERY detailed reply to a post about window tint on the newsgroup RAMVA (rec.autos.makers.vw.aircooled). It had quite a bit up info in it, so I thought I would fix it up a bit and upload it here. For know there wont be too many pictures (I have already tinted my windows.... 3 times...).
![]()
What you need to know if your thinking about tinting your windows yourself:
INTRO:
Lucky for us VW beetle owners, MOST VW beetle windows are EASY to tint (the
exception being the front and rear windows - more on that in a sec)...
In most cases I have found that it is easiest to REMOVE the windows completely
(and take the seals off of them) to tint. Tint IS really worth it.
It keeps your new interior from getting UV damage, it looks cool, and it keeps
the car cooler (thermally). It also is "safer" since it adds a
bit more shatter resistance to the windows.
TYPES OF TINT: If you are going to tint your windows yourself, BUY GOOD TINT! (3M comes to mind) What you want is a METALLIZED tint, NOT a dyed tint. Dyed tint is really only for looks - it makes it harder to see inside the car (from the outside) depending on the darkness, but doesn't block out much UV rays (or at lease SOME don't), and it doesn't block out much heat. Over the years the dyed tints will turn VERY blue/purple (which looks ugly to me). Metallized tints usually block 99% (or so) of UV rays, and quite a bit of heat. Metallized tints also don't 'fade' into a blue/purple color. If you do the tint yourself, I suggest you be extremely patient with it (and buy extra tint, so that if you screw up you can fix it). If your going to do it yourself, flat windows are by far the EASIEST to tint (so "practice" on those first) - if you do it right, you can make flat windows look like they were tinted by the pro's. The big thing to making it look good is PREPARATION! Make sure the glass is clean, clean, clean! DO NOT USE AMMONIA ON THE GLASS RIGHT BEFORE TINTING! Tint comes in all kinds of different "darkness's" - tints will be classified by how much light they let through. The lower the percentage, the darker the tint. Common tints are anywhere from 45% to 5% VLT. 5% tint is about the darkest you can go (though if you look hard you might be able to find 3%). 5% tint is also usually referred to as "limo tint" (lots of limo's use this darkness). Tint is applied to the INSIDE of the window to keep it from getting scratched.
TINT REMOVAL: If you need to remove tint on flat windows, a razor-blade and ammonia works good, but if you will be re-tinting, wait at least 24 hours before doing so (the ammonia will cause the new tint not to stick very well).
Getting old tint of off rear windows (with defroster lines) is a ROYAL PAIN! To make sure you don't RUIN the defroster lines, use some ammonia (just make sure it doesn't loosen the glue on the defroster lines first - it didn't on mine) you must also use one of those PLASTIC scrubbers (for pots and pans). Usually the tint itself just rips off, but it leaves all the glue behind. This is about the only/fastest/best way to do it (it WILL take a long time, and your arm will be tired when you are done). MAKE SURE to use the PLASTIC scrubber (not metal)!
WINDOW TYPES: If your thinking about tinting the rear window with ONE PIECE of tint, forget about it! I've tried (several times) and encountered nothing but disasters; Pro's wont even try with one piece. The rear window has a compound curve (as does the front window - on supers), and in order to make the tint bubble-free, you must use several strips of tint (I used 5 I think) - if you cut it good, you can make it so that its almost impossible to see that it is not one piece of tint. If your real creative you can make the 'cuts' right over the defroster lines (but that is a bit difficult - trust me!). Most people don't tint the front window so its not as big of a deal - if you do tint the front window, I assume you will only be tinting the "sunshade portion" (top couple of inches) - that will be a small strip of tint, so it should work out fine.
TINTING LAWS: Check your local laws (you might be able to find them online) if you want to be "legal". You can find shops that will install illegal tint, but they will make you sign a slip that says its "not their fault if you get a ticket blah blah blah..." You can also buy illegal auto tint at a lot of different places. If you do get caught with illegal tint (most cops don't mess with it), more than likely you will get a "fix it" ticket (so go home and remove all the tint). Some states have laws about the sunshade tint on vehicles... Ever seen that little line that says "AS-1" and has a ---- line (or arrow) or something like that (on newer cars) that's the tint line - it means its "illegal" to tint past that line (By-the-way: most, if not all original/aftermarket bug windows don't have this line) - lots of state laws specify how many inches from the top of the front window you are allowed to tint. Keep in mind that some people find it hard to drive at night with darkly tinted windows (it can be interesting out in the middle of nowhere)... You can still get a good tint that blocks out heat & UV rays while not even looking dark at all. Remember: the tint may be rated at say 20% light transmission, but it is going to be a tad less than that for the NET light transmission (since light has to go through the window AND the tint) - so if you are trying to be 'legal' and the NET "limit" is 20%, you may want to stick with 25% VLT tint, so that by the time the light also passes through the glass you wont be 'illegal'.
APPLICATION: Use good NEW razors, DISTILLED WATER (this is important), a good squeegee, some liquid soap (baby soap), and a clean spray bottle. MAKE SURE the window(s) to be tinted are 'debris' free. It REALLY SUCKS to apply tint to a window, only to shortly thereafter find out there was a piece of dirt/thread/etc under the tint. I like to clean mine first with distilled soapy water & a squeegee - DON'T USE A PAPER TOWEL! (it leaves frizzies behind); Then go over it with a razor. When applying tint, you apply it 'wet' (soapy water works best) - that way you can move the tint into position. Some places will sell a tint "soap" that works well also (baby's soap and distilled water). The reason for distilled water is so that any water still left in between the tint and glass wont leave hard water stains (which you wont be able to remove, and look nasty). Some people cut the exact pattern of the tint to match the window, but I find that more work. If the windows are out of the car, I find its easiest to cut a piece of tint that is larger than the window. Don't forget when you are cutting the tint out to figure out which side is the tint, and which side is the 'peel off plastic.' (the trick is to take two pieces of tape and stick them together at an edge, then peel the tape apart). Spray the soapy water on the sticky side of the tint and on the window, then apply the tint - spray the non-sticky side of the tint (that should now be on the glass) and squeegee from the middle out (repeat as many times as necessary). Once its 'tacked' I usually trim it, and then squeegee it some more. Work from the center out, and watch for bubbles. Pinheads (really small bubbles) *SHOULD* disappear after the tint has completely 'dried' in the sun (usually about 2 days in direct sunlight). Other bubbles can be slit with a knife/razor (but they will still look bad). If a "finger bubble" (one from the edge of the window going 'inward') keeps on 'bubbling up' KEEP ON SQUEEGEE'ING IT! Don't forget - DO NOT roll down/open your windows for at least the first couple days after the 'tint job'.
ADDITIONAL NOTES: if you are using a metallized tint DO NOT BENT IT MUCH OR CREASE IT!!! If you get a crease in it, the tint IS NOT fixable (the crease WILL STAY even after applied to the window).
ALSO: Be SUPER CAREFUL when re-installing tinted windows back into the doors... For some reason I have really bad luck when putting those windows in (they slip, and get scratched, etc.) then I have to do it all over again.
CONCLUSION: I have found that by the time you figure out how to do it, buy the materials, and spend the time, its easier to have a "pro" do it (MUCH less of a headache), but if you want to do it yourself now you know how!
![]()
These are the only pics I can find of MY tint jobs)...
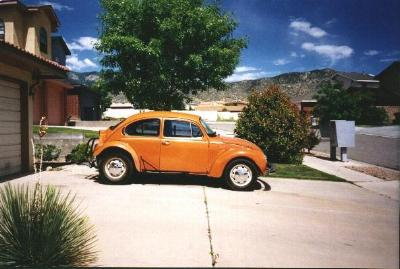
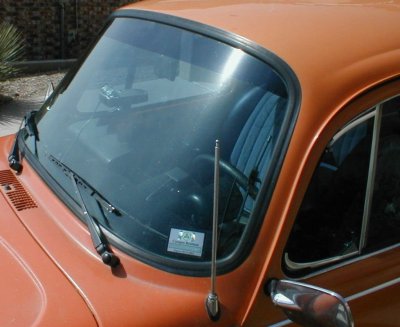
Here are a couple of OLD scanned pictures ('99 vintage) that show my first tint job (the tint was actually MUCH lighter than in these pics) - this tint was CHEAP 40% VLT. The windows came out pretty good (the back window was the worst)... I eventually got tired of the tint being so light.

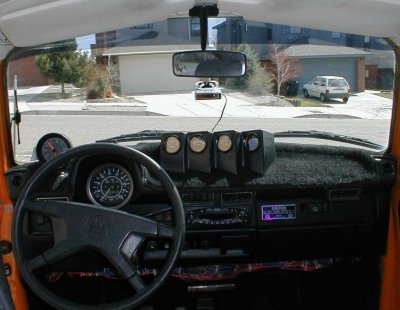
I cant find pics of my 2nd tint job, but here are pics of the 3rd (and final) tint job (pic taken Dec 2001) The tint is 20% VLT (which is pretty dark... With a sunshade in the front window you can just barely see IN the car from a distance). For some reason the picture doesn't show the tint how it looks in REAL LIFE... you get the idea though:

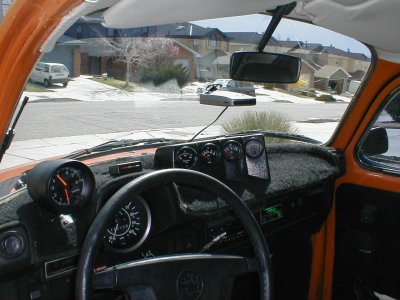
UPDATED PICS (3/30/02)
I added a 'sunshade strip' to the top of the front window, and it should give you a better idea of how dark the 20% tint is. I actually just made it out of 'leftovers' I had to use two pieces and seam them. (the seam turned out good until one of the edges of the tint peeled up -- it looks fine for now though, especially considering I cut it freehand!).
![]()
WARNING, use article at own risk! Please, DO NOT blame me for anything wrong in this article. I am not responsible for any damage to your vehicle, nor am I responsible for any bodily harm incurred as a result of using this article. Use this article as reference only, ALWAYS try to be as safe as possible when working on your vehicle! Respect your car, and it will respect you!