(3/1/2002) - Had an interesting thing happen today... On the way home from a hard day of exams at college, I was waiting for a green arrow to turn left at an intersection... The accelerator pedal went right to the floor, but the engine stayed idling. DOH! I reached down by the pedal, and sure enough the end on the cable was gone. I tried to get it going in 1st gear, but I was kinda' stuck in a rut - I flipped on the 4-way flashers, and my green arrow went away. The rude fool behind me kept on honking... I would have loved to show this person what asphalt tastes like, but he wasn't worth it. At the next green arrow I pushed my car through the intersection to avoid angering anyone else. I coasted down the street and pulled into the parking lot of a paint store. The manager came out and said I could use the phone or whatever I needed - that was nice. I could have 'wired' the throttle open enough to get home, but a couple weeks ago I bought a spare acc. cable from aircooled.net, so I figured might as well fix it right there. It was a bit tricky to get through the engine tin, but I finally got it. I found out just how much my engine needed to be cleaned as I was covered in dirt/oil/grease by the time I was done. I was pretty dirty, but afterwards I still went to subway to pick up a sandwich :-)
I decided I would use the backup cable until I had the time to install the "bulletproof" accelerator cable from aircooled.net - NOW (3/30/02) I have the cable installed and the process is below:
![]()
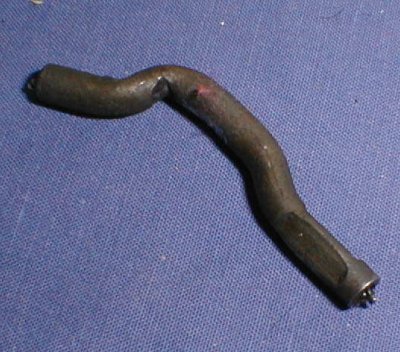
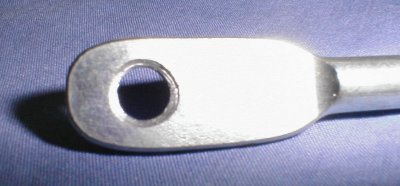
You can see in this pic where the stock cable broke (it took a little bit of 'fishin' to find this piece),
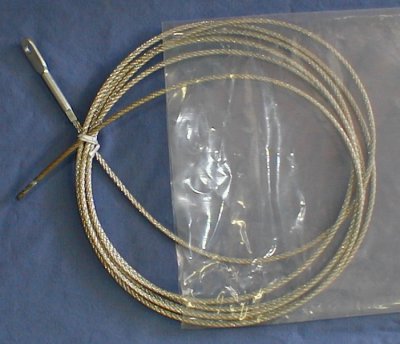
Upon receipt of the box from aircooled.net I opened it up, and found this. 'Holy Schmolly' (as the Porsche boxster TV add says) - that is one HUGE (thick) cable!
![]()
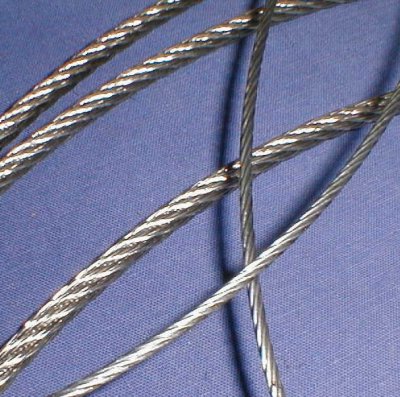
Can you tell which is stock, and which is "bulletproof"? No wonder its guaranteed forever!!
![]()
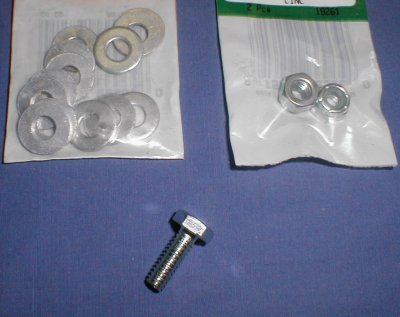
As you can see in the 2nd pic from the top, the new cable doesn't have a "Z" type connector as the wimpy stock unit does, on this new one you have to bolt it onto the accelerator pedal (more on that in a sec.). Before the cable is installed you need to figure out how exactly you are going to attach it. The PROPER way to do this is to machine yourself a collared bolt, I would have, but I didn't have the time and $$. So, my suggestion if you cannot machine your own bolt with a custom collar is to use washers, a bolt, and a nylock nut. For some reason I COULDN'T FIND the "perfect size" at my hardware store. I ended up getting a 1/4" bolt (1" long), and several washers that fit, and a couple nylock nuts. The 1/4" bolt proved to be slightly too thick (the only other option was WAY to thin). I decided to press on anyway.
![]()
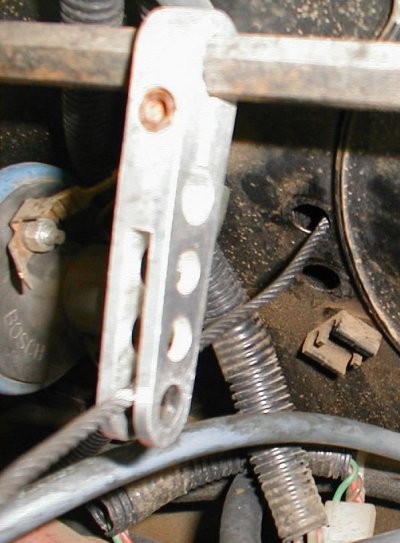
Since the bolt was slightly too large, the hole in both the accelerator cable AND accelerator pedal will have to be enlarged. The pic below shows roughly how much bigger the hole will be. At first this DID concern me, because with the larger hole, the material is thinner around the hole (which could mean it might stretch over time) - thus far I have not had any problems with it however. When you drill the hole in the pedal, I find that its easiest to remove the 'roller' part. Also: as a sidenote I noticed that when I drilled out the hole in the pedal, It was VERY close to being the correct size anyway.
![]()
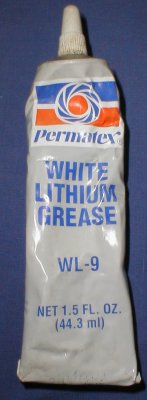
So, with all that figured out, its on to that actual installation! The first thing you gotta' do is pull out your old cable (if you haven't already). Its easiest to simply disconnect it from your carb(s) and then disconnect it from your pedal and then simply pull out the entire cable from behind the pedal (it will be dirty/greasy!). Installation of the new one is the reverse of removal. You basically just want to 'feed' it into the tube (you might not be able to see it, but you should be able to feel it on the tunnel - peel up some carpet if you have to). What you want to do is lube it as you put it in. I used some White Lithium Grease. Just lube about 4" of it, and push it in the accelerator tube, and lube it again, etc. You'll get about 80% of it in EASILY and then it will start coming out the back and this is where it becomes "fun" (in my case I was able to reach behind the fan-shroud and guide the wire through the tin.) NOTE: In my case I found it easier to install if you remove the accelerator guide tube from the fanshroud (it just pulls right out). You can install it later (around the accel. cable) after the cable has been pulled through the shroud.
![]()
As I said earlier, getting the cable through the fanshroud tin is the hardest part of the installation!! Don't be surprised if you don't get it through the tin the first 20 or so tries :-) (it took me a WHILE). I fount it is also helpful to use a piece of bailing wire to fish it through. As I mentioned above, another tip is to pull out the metal accel. cable guide 'tube' that is in the fanshroud, so you have more ROOM to work with (you can install it later). It might also help to have one of those flex-a-lights with the TINY bulbs so you can stick it in and see WHERE the cable is.
![]()
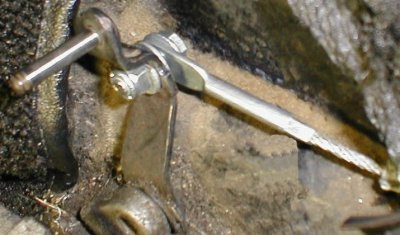
Once the cable is through the tin CLAMP it or something so that you don't accidentally yank it back through again!! The next think that I did was attach the cable to the pedal. You can see how I did it in 2nd the pic below. It turned out that the 1" bolt was a tad to long to fit because of the cramped space, so I had to cut off some of the length. You will have to use your own judgment to figure out how long to make it. (I tried a 3/4" bolt, but I think it is slightly to short with several washers and a nylock nut!). You will basically want to make it somewhere between a 3/4" and 1" long bolt (I know that's not much). When I had mine cut properly I was BARELY able to get it into the hole (at an awkward angle). I used a total of 3 washers - one had to be cut like the pic below in order to fit with the angles of the pedal. Since this bolt isn't collared you will not want to tighten it down ALL the way (it needs to rotate a little). So tighten it so that it will still 'swivel' easily.

![]()
With that done, you can re-install the roller and put the carpet back down under there. Then you can attach (and adjust) the cable at your carbs. (it WILL be excessively long) - DON'T FORGET to reinstall the throttle cable guide tube through the shroud (if you removed it to ease installation)! Now you want to cut the excess cable off. I left a little over 1" to be safe. The last thing to do is to keep the end from unraveling. I tried a torch and solder (with flux) but it simply wouldn't solder! (It has something to due with the makeup of the cable) - I ended up lighting up the oxy-acetylene and using a bronze rod (with flux) and brazing it (hard to tell from the pic).
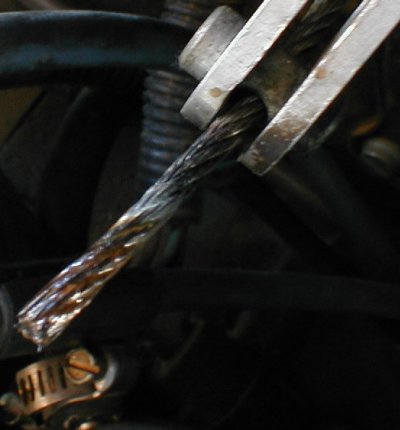
![]()
That's it! The only thing that I worry about is the head of the cable stretching (where the bolt goes through). I've been keeping an eye on it and have had no problems so far! I still always keep a stock cable in the trunk JUST IN CASE! (as well as a clutch cable).
![]()
![]()