![]()
Have you installed a CDI in your ignition system (or any other "high output" system)? Have you been going through rotors like crazy? Have you noticed your car ran fine with the CDI for a week, and then starting running like crap? Are you planning on installing a CDI, and want to know what has to be done to keep all this from happening? The main weakness of the original VW ignition system after installing a CDI (or any other 'substitute'), is that the resistor in the rotor CANNOT handle it. When the resistor inside the rotor burns out, you are left with a cruddy running engine (if it even runs at all), and you have probably spent all day in the driveway 'troubleshooting' what the problem could be. The "simple" solution, is to dremel out the epoxy in a rotor, and solder in a piece of stranded (at least 16 Ga.) copper wire, and then re-epoxy over it. This tech article will basically explain this procedure.
![]()
First, you will start out with your standard VW rotor. I prefer Bosch (the orange ones) because they are overall the best. (you can order one from www.aircooled.net) This is what you should be starting with:

![]()
In order to remove the epoxy, and get to where we will be soldering a piece of wire, you will need a dremel (or equivalent), and a couple bits. I used a small and a large bit:

![]()
This is how I set up to dremel the rotor. I have the flex wand installed on my dremel to make it easier to work with. I have a dowel rod clamped in the vice, and then I just slid the rotor on top.

![]()
Use the large bit, and remove all the epoxy in the large areas, that the bit will fit into. Go slow! Also: The orange piece of the rotor is some kind of ceramic, it is much harder than the epoxy, so don't worry too much about ruining that part. The resistor is in the larger-front middle section (you will be dremeling through it, so don't worry about it either).


![]()
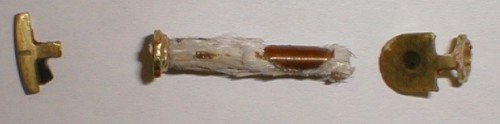
To give you a better idea of what the inside of a rotor looks like, I have destroyed a cheap one to show you. The piece to the left is the tip of the rotor, which has a brass "O" ring that the resistor (MIDDLE) fits into. The right piece which is the center of the rotor has another brass "O" ring that the other end of the resistor fits into. These brass "O" rings are what we will be soldering our wire into.
![]()
Now you can continue to dremel the rotor with the small bit, so you can get into all the small crevices. If you do it right, there will still be enough epoxy holding the center and tip pieces in. This is what it should look like when you are done dremeling:


![]()
Now you will need: some stranded 16Ga. or heavier wire (I used 12 Ga. If fits PERFECT!), some flux, some soldering wire, and a solder-gun.


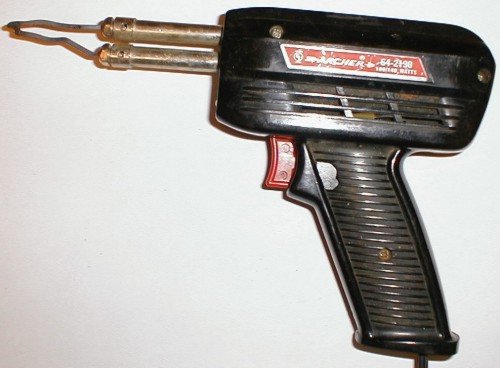
I used a heavy duty-high heat gun (below), but a standard one will work also:

![]()
What you want to do is strip off about 2 inches of the wire insulation. Then put some flux on both ends of the wire, AND the brass "O" rings in the rotor. Carefully slide the wire in the brass "O" rings, and cut the wire to proper length. Once in place, solder the wire inside the brass "O" rings:


![]()
Now the 'hard-part' is over! The next step is to fill the rotor cavity back up with epoxy. Almost ANY epoxy will do, but I found it best to use at LEAST a 15 minute epoxy (I used a 30 minute), this way you have plenty of time to get the epoxy in, and work it around, and tamp it before it dries. You CAN buy colored epoxy (to make it look like the original), but I prefer clear; With it clear, you can tell its a modified rotor, plus it looks kinda cool! This is the stuff I used:

![]()
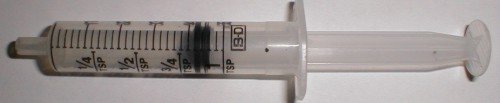
Once you mix up the epoxy, I found it best to 'pour' it into a syringe. It is best to pull out the 'plunger' and pour in the epoxy from the top. Then you can get the air out, and squeeze the epoxy out. All you have to do now, is carefully start to fill up the rotor with the epoxy. Fill it up to about the same level as it was originally. You may find it helpful to work out some of the air bubbles, and fill the cavities better with a toothpick. You can find the syringes at Walgreen's (or any pharmacy):
Its
hard to see in these pics, but this is what it looks like when the epoxy has
cured (a full 24 hours is preferred).
You can kinda' see
the 'level' of the epoxy in this pic:
Well,
that's all there is to it! I went ahead and modified 2 more, this way I
had one to put in the distributor, one to put in the glove-box (backup), and one
to keep in the garage (just-in-case). Now your CDI will NEVER burn out
your rotor again!
WARNING, use
article at own risk! Please, DO NOT blame me for anything wrong in this
article. I am not responsible for any damage to your vehicle, nor am I
responsible for any bodily harm incurred as a result of using this article.
Use this article as reference only, ALWAYS try to be as safe as possible when
working on your vehicle! Respect your car, and it will respect you!
![]()


![]()
![]()