![]()
Have you been doing more 'night driving' lately? Have
you noticed that the original sealed beams are dim (not to mention
yellow)? I did, and I finally got tired of it. I ordered up a set of
H4 Cibie E-codes with city lights from: www.seriousauto.com
they have about the best price on them, PLUS they come with the city light bulb,
and a pretty nice Hella H4 55/60W bulb! That's everything you need all in
one! I ordered mine with the city lights, but you can order with or
without; What are city lights you ask? City lights are a tiny 4-watt bulb,
that installs into the headlight. When you turn on your parking lights
(everything except the H4), the small city light makes the whole headlamp
glow. Not only is it "cool" looking, but it is also safer!
This is a great, and fairly simple upgrade that is REALLY worth it. My
headlights look 2 times brighter, and about 30X's whiter. If you order the
Cibies WITHOUT the city lights, you probably WONT have to do ANY
modifications. However, if you DO order the city lights, you WILL have to
do a little bit of modification (if you have a dremel, you can do it!).
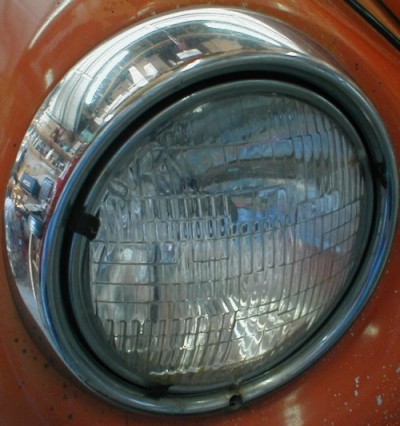
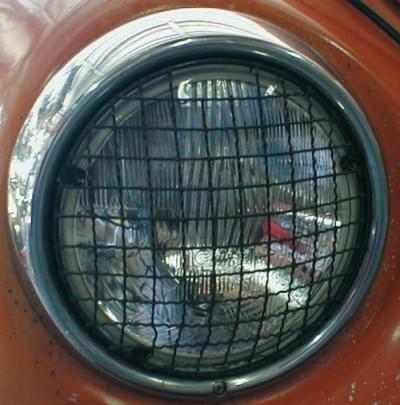
Here is what my old sealed beams looked like from inside. Notice: they
aren't very bright, and they are very YELLOW in color.
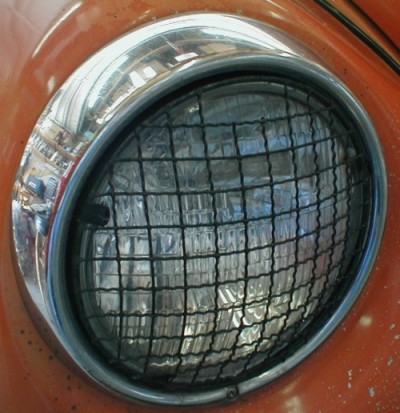
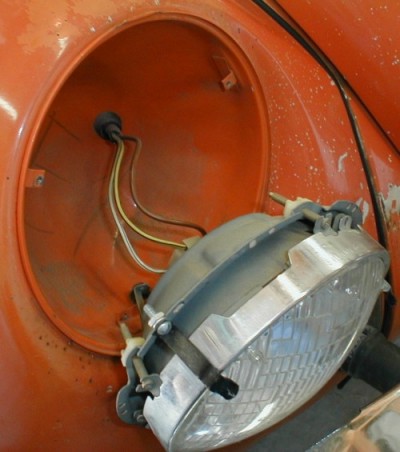
O.K. More than likely, this is what you will be starting with. On
my car, I had an old "mesh" headlight protector (recommended to help
protect the headlamp!). This had to be removed first by simply bending its
tabs.
Once that is removed, you can remove the headlight ring retaining screw.
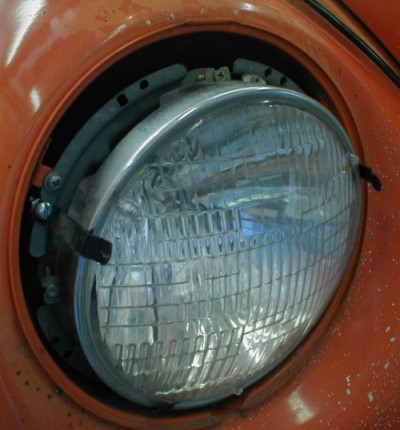
Once the headlight ring is removed, this is what you are left with.
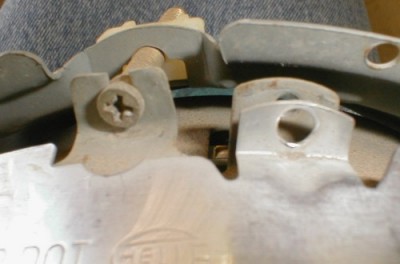
The screw on the left, is the headlight adjusting screw. The screw
(screw already removed) in the middle is the headlight retaining ring
screw. The screw (screw already removed) on the right is the screw that
holds the whole unit inside the bucket.
Once you remove the three screws that hold the whole unit inside the bucket,
you can unplug the light. You then need to remove the headlight retaining
ring, and pop the headlight out.
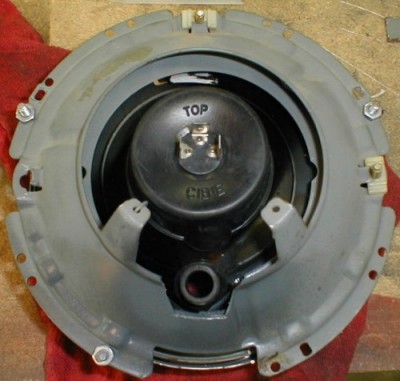
On the left is the headlight adjusting "chassis" that you adjust
the headlight with, and on the right is the headlight retaining ring, which
holds the headlight in the adjusting "chassis"
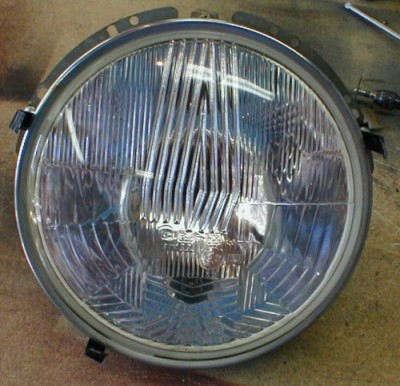
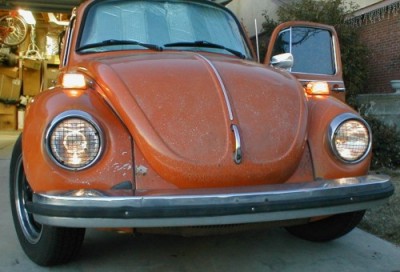
Ahh, now comes the fun part! This is one of my new Cibie E-code
headlamps (w/city lights).
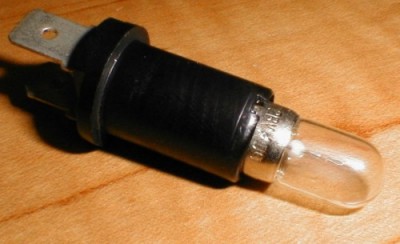
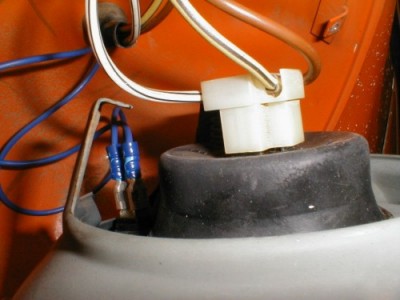
This is what the city light looks like. It simply hooks up to a ground,
and a +12 Volts when the parking lights are turned on.
This is what the Hella H-4 55/60W bulb looks like. Before you install
the light, you should wipe the bulb down with rubbing alcohol - Any oils (even
from your fingers), will create a "hotspot" on the glass and the bulb
will fry. Personally, I used 91% Isopropyl rubbing alcohol from Walgreen's
(or any pharmacy). Use a paper towel to wipe it with.
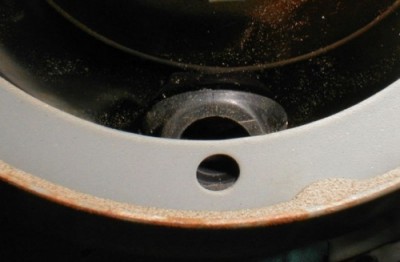
If you bought the Cibies WITHOUT the city lights, you can skip this
modification. BUT if you bought the Cibies WITH the city lights, you MUST
do this modification. Below you can see that when the headlight is put
into the adjusting "chassis", the City light wont clear.
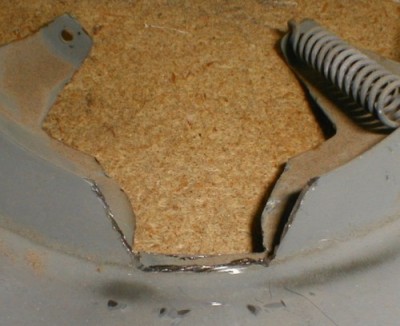
Basically, just use a dremel with a cutting disc and remove the material that
gets in the way.
This is what you should end up with. Make sure all the edges are
relatively rounded, and use a file or sandpaper on the edges. Once that's
done, spray it with some paint (or primer) to keep it from rusting.
Now that the headlight fits in the bucket, you can go ahead and put the
headlight retaining ring on, and tighten the screws down.
Here's what the backside looks like, once I painted the edges, installed the
H4, and installed the boot. When you install the boot, make sure the part
that says "top" is to the top of the light (there is a little one-way
water drain that goes to the bottom).
Now you can go ahead and hook up the wires. The neat thing about the H4
bulb, is that the connectors are the EXACT same as the sealed beam units (so you
don't have to modify the wiring harness). The only extra wiring you will
have to do is for the city lights (if you ordered them in the first
place). One wire should go to a ground, the other should go to a +12 Volt
when the parking lights are turned on.
The rest of the installation is the reverse of removal. I opted to keep
the mesh guards, because they look cool, and they protect the headlight. (you
can find them at pep-boys or equivalent, if you want them).
Here's what the city lights look like. Pretty cool eh?
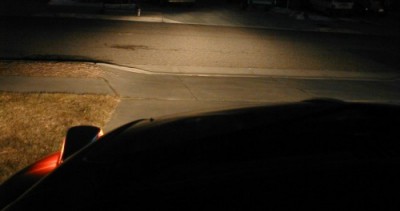
Here's what the headlights look like at night (they still need to be
adjusted...). You can see, they are much brighter!
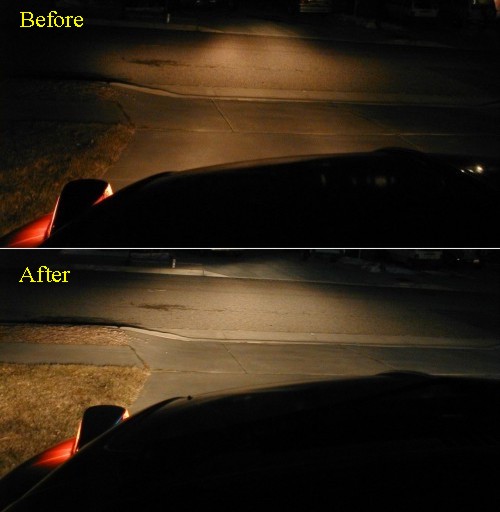
The pic above doesn't do the lights justice. Here is one from outside that
shows how much whiter the lights are.
This picture also doesn't do the Cibies justice, but it gives you an idea of
the difference.
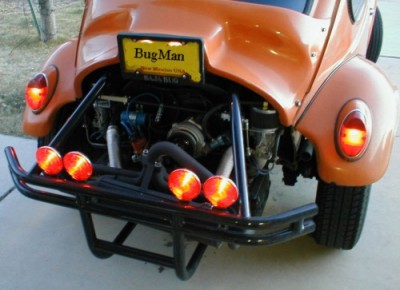
Wonder what my taillights look like? (BTW those ARE just the parking lights!)
After you have installed the Cibies, you should adjust them. I haven't
adjusted my headlights yet (they are close for now), but soon I will. Once
I get pics of the adjusting procedure, I will post them here.
![]()

![]()
![]()
![]()
![]()
![]()
![]()

![]()

![]()
![]()

![]()
![]()
![]()
![]()
![]()
![]()
![]()
![]()
![]()

![]()
![]()
![]()
![]()